
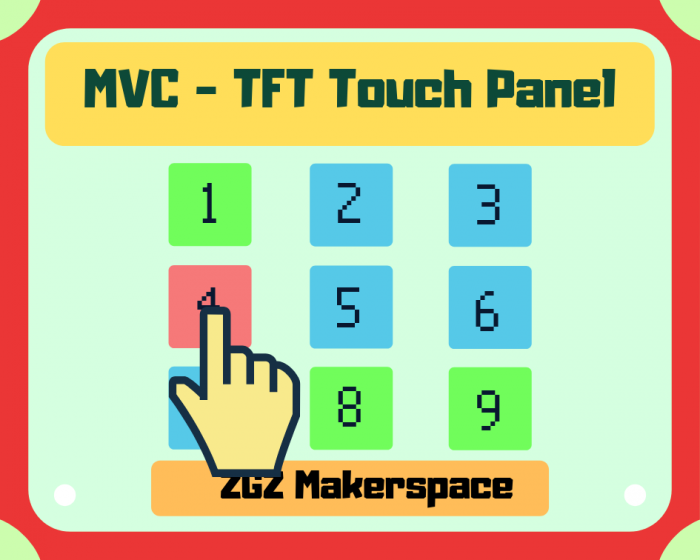
Aprovechandotodo lo aprendido anteriormente, vamos a explotar la capacidad de las pantallas táctiles para aquellos que no han podido desarrollar el programa anterior en caso de no disponer de un teclado o Keypad.
En esta ocasión realizaremos el mismo ejercicio, pero ahora mismo, nuestro controlador lo cambiaremos por el modelo táctil que nos proporciona nuestra pantalla.
Pinout
Hay que prestar mucha atención cuál es nuestro modelo, porque aunque muchas pantallas puedan funcionar con la misma librería base para los gráficos como puede ser Adafruit_GFX, no ocurre igual con el modelo táctil. Seguramente dependiendo de la pantalla que tengamos, necesitaremos una librería u otra.
En nuestro caso vamos a utilizar el modelo que viene con la pantalla ILI9341.
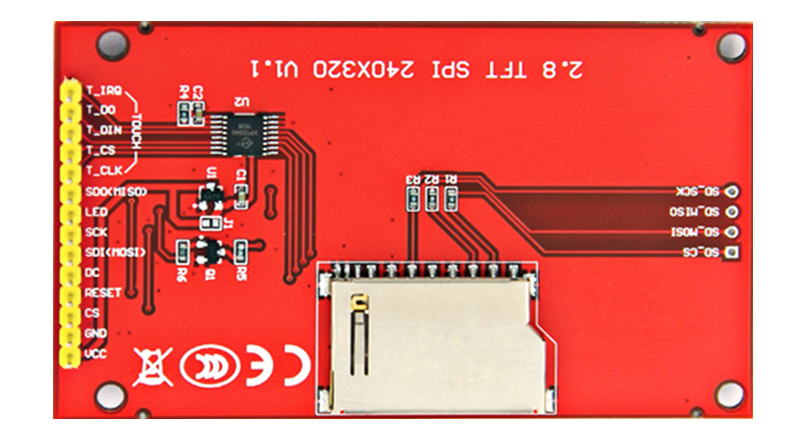
Como podremos observar, los pines habilitados para la pantalla táctil, son los que aparecen marcados como:
- T_IRQ
- T_D0
- T_DIN
- T_CS
- T_CLK
Estos pines requieren de una librería especial denominada UTOUCH o una llamada URTouch y que NO se encuentra en los repositorios de Arduino. Por lo que es necesario descargarla e introducirla manualmente dentro de la carpeta libraries de nuestro sistema.
IMPORTANTE: Las pantallas táctiles suelen ser resistivas y la mayoría de las veces hay que calibrarlas primero.
Con este código podemos crear una primera aproximación para obtener las coordenadas en el punto de la pantalla sobre el que presionamos.
#include <URTouch.h>

#define T_CLK 7
#define T_CS 3
#define T_DIN 4
#define T_D0UT 5
#define T_IRQ 6

#define TOUCH_ORIENTATION  LANDSCAPE

URTouch  TS( T_CLK, T_CS, T_DIN, T_D0UT, T_IRQ );

uint32_t x, y;

void setup() {
  Serial.begin(9600);
  Serial.print("Touchscreen TFT ");
  TS.InitTouch(TOUCH_ORIENTATION);
  TS.setPrecision(PREC_MEDIUM);
}

void loop() {
  if (TS.dataAvailable()) {
      TS.read();
      x=TS.getX();
      y=TS.getY();
      Serial.print("X: ");Serial.print(x);Serial.print("\tY: ");Serial.print(y);
    }
}
Una vez que obtenemos la coordenada sobre la que hacemos presión, en un tutorial anterior hablabamos sobre la capacidad del objeto GFXButton que venía integrada en la librería de Adafruit_GFX.
Este objeto contiene un método denominado contains para identificar si hemos presionado sobre él conociendo sus límites de ancho y alto.
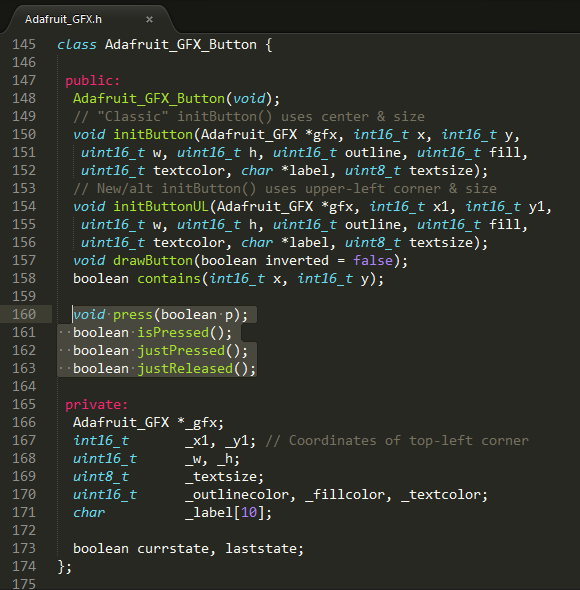
Asi que lo único que tendremos que añadir a nuestro programa será la ejecución de un evento en el momento que presionemos este botón dentro del loop.
Os recomendamos revisar los tutoriales anteriores para aplicar la clase que hemos desarrollado y cómo hacer un juego de contraseñas en la pantalla táctil.
#include <URTouch.h>
#include "Adafruit_GFX.h"
#include "Adafruit_ILI9341.h"

#define TFT_DC 8
#define TFT_CS 9

#define BLACK   0x0000
#define BLUE    0x001F
#define RED     0xF800
#define GREEN   0x07E0
#define CYAN    0x07FF
#define MAGENTA 0xF81F
#define YELLOW  0xFFE0
#define ROSE  0xF81F
#define WHITE   0xFFFF

Adafruit_ILI9341 tft = Adafruit_ILI9341(TFT_CS, TFT_DC);

const byte ROWS = 4; //four rows
const byte COLS = 4; //three columns

#define T_CLK 7
#define T_CS 3
#define T_DIN 4
#define T_D0UT 5
#define T_IRQ 6

#define TOUCH_ORIENTATION  LANDSCAPE

URTouch  TS( T_CLK, T_CS, T_DIN, T_D0UT, T_IRQ );

uint32_t x, y;


class TXTButton: public Adafruit_GFX_Button{
  public:
    uint16_t _x, _y, _w, _h;
    uint8_t _marginx, _marginy, _txtsize;
    uint16_t _c, _c_txt, _c_border;
    char* _msg;
    String _str;

    TXTButton::TXTButton(void):Adafruit_GFX_Button(),_marginx(10), _marginy(5), _c( 0xFFFF ), _c_txt( 0x0000 ), _c_border( 0xFFFF ), _txtsize( 4 ) {};

    TXTButton( char* msg, uint16_t x, uint16_t y, uint16_t c = 0xFFFF , uint16_t txtc = 0x0000,uint16_t borderc = 0xFFFF, uint8_t textsize = 4,  uint8_t mgx = 10, uint8_t mgy = 10  )
      :Adafruit_GFX_Button( ),_str( msg ), _x( x ), _y( y ),_marginx(mgx), _marginy(mgy), _c( c ), _c_txt( txtc ), _c_border( borderc ), _txtsize( textsize )  {
      _msg = msg;
    }

    TXTButton( String msg, uint16_t x, uint16_t y,  uint16_t c = 0xFFFF , uint16_t txtc = 0x0000, uint16_t borderc = 0xFFFF, uint8_t textsize = 4,  uint8_t mgx = 10, uint8_t mgy = 5  )
      :Adafruit_GFX_Button( ),_str( msg ), _x( x ), _y( y ),_marginx(mgx), _marginy(mgy), _c( c ), _c_txt( txtc ), _c_border( borderc ), _txtsize( textsize )  {

    }

    void init (Adafruit_GFX& _tft ){

      uint16_t msg_w = _str.length()*_txtsize*5+ (_str.length()-1)*_txtsize;
      uint16_t msg_h = _txtsize*8;

      //Tamanio real del boton
      uint16_t btn_w = msg_w+2*_marginx;
      uint16_t btn_h = msg_h+2*_marginy;
      // Center of Button

      uint16_t btn_x = _x ;
      uint16_t btn_y = _y ;

      char buf[ 10 ];
      _str.toCharArray( buf, _str.length()+1 );
      initButton( &_tft ,btn_x, btn_y, btn_w, btn_h, _c_border , _c, _c_txt, buf, _txtsize);
    }

    void setStr( char* msg ){
      _str = msg;
    };

    void setStr( String  str ){
      _str = str;
    };

    void setTextSize( uint16_t  size ){
      _txtsize = size;
    };

    void setMarginSize(  uint16_t  mx,uint16_t my ){
      _marginx =mx;
      _marginy =my;
    };

    void setXY( uint16_t  x,uint16_t y ){
      setX(x);
      setY(y);
    };

    void setX( uint16_t  x ){
      _x =x;
    };

    void setY( uint16_t  y ){
      _y =y;
    };

    void setColor( uint16_t  c, uint16_t ctxt, uint16_t cBorder ){
      setFillColor(c);
      setTextColor( ctxt );
      setBorderColor (cBorder);
    };

    void setTextColor( uint16_t  c ){
      _c_txt = c;
    };

    void setBorderColor( uint16_t  c ){
      _c_border = c;
    };
    void setFillColor( uint16_t  c ){
      _c = c;
    };

    void draw(bool inv = true){
      drawButton(inv);
    }

    void clear(Adafruit_GFX& _tft, uint16_t  c ){
      setColor( c, c, c );
      init ( _tft );
      draw(true);
    }
};

#define nrows 3
#define ncols 4
#define n nrows*ncols

TXTButton btn_list[n];


void setup() {
  Serial.begin(9600);
  Serial.print("Touchscreen TFT ");
  TS.InitTouch(TOUCH_ORIENTATION);
  TS.setPrecision(PREC_MEDIUM);

  tft.begin();  // Begin ILI9341
  tft.setRotation(3);
  tft.fillScreen ( WHITE );

  createPanel();

}

void loop() {
  if (TS.dataAvailable()) {
      TS.read();
      x=TS.getX();
      y=TS.getY();
      Serial.print("X: ");Serial.print(x);Serial.print("\tY: ");Serial.print(y);

      for(int i=0;i<n;i++){
        if ( btn_list[i].contains(x,y)  ) {
          Serial.println( btn_list[i]._msg );
        }
      }
    }
}

void createPanel(){

  int w = tft.width() ;
  int h = tft.height() ;


  int l = h/6;
  int lx = w/(2*ncols);
  int ly = h/(2*nrows);

  String strlist[n] = { "0","1","2","3","4","5","6","7","8","9","10","11"};

  //Grid of numbers in list
   for(int i=0;i<n;i++){
    int my = (2*(i/ncols)+1);
    int mx = (2*(i%ncols)+1);

    int row = my*ly;
    int col = mx*lx;

    btn_list[i].setXY(w/2-ncols*lx+col, h/2-nrows*ly+row);
    btn_list[i].setStr( strlist[i] );
    btn_list[i].setColor( BLACK, YELLOW, CYAN );
    btn_list[i].init(tft);
    btn_list[i].draw();
   }
}

void waitForTouch()
{
  while (TS.dataAvailable() == true) {}
  while (TS.dataAvailable() == false) {}
  while (TS.dataAvailable() == true) {}
}
Ahora solo faltaría pensar en un formato de juego que se adapte a nuestras necesidades para desarrollar en una pantalla con eventos táctiles.
Para finalizar tu juego, puedes acceder desde el siguiente enlace.